
The casual wear production process turns a clothing idea into finished garments that are ready to sell. It normally includes product planning, fabric sourcing, pattern making, sampling, cutting, sewing, quality inspection, packaging, and shipping.
From my experience working with casualwear production, most serious problems do not begin on the sewing line. They usually begin earlier—with unclear measurements, unsuitable fabric, incomplete sample comments, or rushed approval.
A reliable production process is a series of approvals. Each stage should be checked before the next stage begins.
This guide explains every stage in simple language and shows clothing brands what they should approve before bulk production.
Table of Contents
- Quick Answer
- Casual Wear Production Process at a Glance
- Choose the Right Production Model
- Step 1: Create the Product Brief
- Step 2: Review Cost and Feasibility
- Step 3: Source Fabrics and Trims
- Step 4: Develop the Pattern
- Step 5: Make the First Sample
- Step 6: Approve the Pre-Production Sample
- Step 7: Prepare and Inspect Bulk Materials
- Step 8: Cut the Fabric
- Step 9: Add Printing or Embroidery
- Step 10: Sew the Garments
- Step 11: Finish and Press the Garments
- Step 12: Inspect Bulk Quality
- Step 13: Pack and Ship the Order
- The Four Production Approval Gates
- Common Causes of Production Delays
- What Brands Should Prepare
- FAQ
- Conclusion
Quick Answer
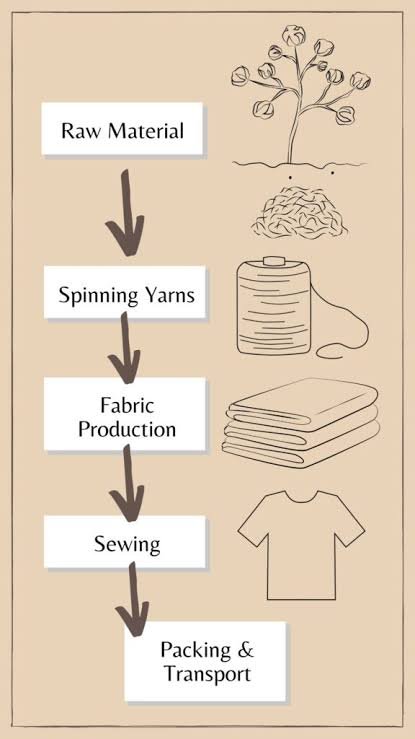
The casual wear production process usually follows these stages:
- Define the product.
- Confirm the design and measurements.
- Select fabric and trims.
- Develop the pattern.
- Make and revise samples.
- Approve the final sample.
- Order and inspect bulk materials.
- Cut the fabric.
- Complete printing or embroidery.
- Sew the garments.
- Finish and press the products.
- Inspect the bulk order.
- Pack and ship the garments.
The exact process changes according to the product.
A basic T-shirt may have a simple production route. A washed jacket with embroidery, lining, custom hardware, and special packaging will require more stages.
My most important advice is:
Do not begin bulk production until the sample, fabric, measurements, colors, trims, branding, quantity, price, and delivery plan are confirmed in writing.
Casual Wear Production Process at a Glance
| Production Stage | Main Work | Brand Approval Needed |
|---|---|---|
| Product Planning | Design, fit, quantity, target price | Product brief |
| Material Sourcing | Fabric, rib, thread, zippers, labels | Fabric and trims |
| Pattern Development | Garment shape and measurements | Measurement chart |
| Sampling | Prototype and fit testing | Approved sample |
| Pre-Production | Bulk materials and production files | Final specifications |
| Cutting | Fabric spreading and pattern cutting | Cutting plan |
| Decoration | Printing, embroidery, washing | Strike-off or artwork |
| Sewing | Garment assembly | In-line quality standard |
| Finishing | Thread trimming, pressing, cleaning | Appearance standard |
| Final Inspection | Measurements, workmanship, quantity | Inspection result |
| Packing | Folding, labels, bags, cartons | Packaging method |
| Shipping | Freight and export documents | Delivery plan |
Brands can view common product categories through the Custom Clothing Products Catalog.
Choose the Right Production Model
Before development begins, decide how much support you need from the manufacturer.
| Production Model | Best For | What You Provide |
|---|---|---|
| OEM | Brands with complete designs | Tech pack, artwork, measurements |
| ODM | Brands with ideas or references | Mood board, concept, target customer |
| Private Label | Brands that want a faster launch | Logo, colors, labels, minor changes |
Choose OEM When
- You already have detailed tech packs.
- You want full control over fit and construction.
- You have tested your designs.
- You need repeatable production.
Choose ODM When
- You have product ideas but no complete pattern.
- You need fabric or fit recommendations.
- You want development support.
- You are creating a new category.
Choose Private Label When
- Speed is more important than full customization.
- You want to use an existing product base.
- You are testing a new market.
- Your main changes are colors, labels, prints, or packaging.
Brands can compare these options through OEM and ODM Manufacturing Services and Private Label Clothing Manufacturing.
Step 1: Create the Product Brief
The product brief tells the manufacturer exactly what you want to make.
It should include:
- Product type
- Reference images
- Target customer
- Intended fit
- Fabric preference
- Colorways
- Size range
- Logo placement
- Estimated quantity
- Target price
- Required delivery date
A full tech pack may also include:
- Technical drawings
- Measurement chart
- Stitching details
- Fabric specifications
- Label artwork
- Print or embroidery artwork
- Packaging instructions
From my experience, a clear product brief saves time at every later stage.
Weak Brief vs Useful Brief
| Weak Information | Useful Information |
|---|---|
| “I want a premium hoodie” | “Relaxed-fit 400 GSM cotton-blend hoodie” |
| “Make it oversized” | Shoulder, chest, length, and sleeve measurements |
| “Use good cotton” | Composition, weight, texture, and finish |
| “Logo on the front” | Artwork file, size, color, and exact position |
| “I need it quickly” | Required ex-factory and arrival dates |
The manufacturer should ask questions when information is missing. Immediate agreement without technical discussion is not always a good sign.
Step 2: Review Cost and Feasibility
Before making a sample, the manufacturer should check whether the product can be produced within the brand’s quantity, budget, and timeline.
The quotation may include:
- Fabric
- Trims
- Pattern development
- Cutting and sewing
- Printing or embroidery
- Garment washing
- Labels and hang tags
- Packaging
- Testing
- Shipping
Important Feasibility Questions
Ask:
- Is the fabric available in the required quantity?
- Does custom dyeing have a separate MOQ?
- Is the design suitable for the selected fabric?
- Can the artwork be produced at the requested size?
- Does the target price match the product complexity?
- Can production finish before the required shipping date?
This stage prevents a brand from developing a product that cannot be produced at a practical cost.
Step 3: Source Fabrics and Trims
Fabric affects the garment’s comfort, fit, durability, appearance, and price.
The manufacturer may provide:
- Stock fabric options
- Custom-developed fabric
- Available color cards
- Lab dips for custom colors
- Fabric swatches
- Printed or dyed strike-offs
Stock Fabric vs Custom Fabric
| Option | Main Advantage | Possible Limitation |
|---|---|---|
| Stock Fabric | Faster and suitable for smaller orders | Limited colors or specifications |
| Custom-Dyed Fabric | Better color control | Higher MOQ and longer preparation |
| Custom-Developed Fabric | Unique weight, texture, or performance | More testing, cost, and lead time |
For a first order, I often recommend using a proven stock fabric when it meets the product requirements. Custom fabric is more suitable when the material is an important part of the brand identity.
Brands can explore different weights, compositions, textures, and finishes through Custom Fabric Development.
Trims may include:
- Rib
- Elastic
- Thread
- Zippers
- Buttons
- Snaps
- Drawcords
- Woven labels
- Care labels
- Hang tags
Custom branding components are available through Customized Accessories and Trims.
Step 4: Develop the Pattern
A clothing pattern is the set of shapes used to cut each part of the garment.
For example, a basic T-shirt pattern may include:
- Front body
- Back body
- Sleeves
- Neck rib
The pattern maker uses the design, measurements, fabric stretch, shrinkage, and intended fit to create these pieces.
What Pattern Development Controls
- Garment shape
- Fit
- Balance
- Sleeve angle
- Shoulder position
- Neck opening
- Pocket placement
- Waist and hip proportions
After the base size is approved, the pattern is graded into the other sizes.
Grading is not simply adding the same measurement everywhere. Each area must increase according to the body and intended fit.
A relaxed-fit garment still needs a balanced pattern. Making every measurement wider does not automatically create a good oversized fit.
Step 5: Make the First Sample
The first sample turns the design into a physical garment.
It allows the brand to check:
- Overall appearance
- Fit
- Measurements
- Fabric behavior
- Construction
- Comfort
- Logo size and position
- Trim function
The first sample is not always expected to be perfect. Its main purpose is to identify what needs improvement.
How to Review the Sample
- Measure it against the specification.
- Try it on the intended body size.
- Check movement and comfort.
- Inspect the inside construction.
- Test zippers, buttons, and pockets.
- Wash it when wash performance matters.
- Record all comments in one document.
Avoid sending corrections through several separate messages. One organized comment sheet reduces misunderstandings.
Step 6: Approve the Pre-Production Sample
After revisions, the manufacturer prepares a final approved sample or pre-production sample.
This sample should represent the intended bulk product.
Before approval, confirm:
- Fabric
- Color
- Measurements
- Fit
- Stitching
- Printing
- Embroidery
- Labels
- Trims
- Wash effect
- Packaging
What “Approved” Should Mean
Approval should mean that the product can enter bulk production without unresolved design changes.
Do not write “approved” when you still expect the factory to make important corrections later.
From my experience, comments such as “please improve this during bulk” create unnecessary risk. Important improvements should be shown and confirmed before production begins.
Step 7: Prepare and Inspect Bulk Materials
After sample approval and order confirmation, the manufacturer prepares bulk fabric, trims, labels, and packaging.
Bulk fabric may be checked for:
- Color
- Weight
- Usable width
- Fabric defects
- Shrinkage
- Shade differences
- Stretch
- Surface appearance
Trims should be compared with the approved sample or trim card.
Why Shade Grouping Matters
Different fabric rolls may have small shade differences.
If pieces from noticeably different rolls are sewn into one garment, the front, back, or sleeves may not match.
For this reason, fabric rolls may be separated by shade before cutting.
This is especially important for:
- Solid dark colors
- Garment-dyed products
- Denim
- Washed fabrics
- Large garment panels
Step 8: Cut the Fabric
During cutting, fabric is spread in layers and pattern pieces are arranged on top.
The cutting team should check:
- Fabric direction
- Grain line
- Print direction
- Size ratio
- Pattern placement
- Shade grouping
- Cutting accuracy
- Fabric defects
After cutting, bundles are normally organized by:
- Style
- Color
- Size
- Fabric batch
- Production quantity
Accurate cutting is important because sewing cannot completely correct badly cut pieces.
Plaids, stripes, directional prints, and placement patterns require additional control because visual alignment matters.
Step 9: Add Printing or Embroidery
Some decoration is completed before sewing, while other decoration is added after the garment is assembled.
The correct sequence depends on the design.
Common methods include:
- Screen printing
- Heat transfer
- Digital printing
- Embroidery
- Appliqué
- Patches
- Garment washing
What Should Be Approved First?
Before bulk decoration, confirm:
- Artwork size
- Position
- Colors
- Thread type
- Print texture
- Embroidery density
- Fabric compatibility
- Wash durability
A print strike-off or embroidery test can be approved before the entire order is decorated.
Large or dense embroidery may affect thin fabric, while high-temperature transfers may not suit every synthetic material. The decoration method must match the fabric.
Brands can compare available techniques through Custom Printing Services.
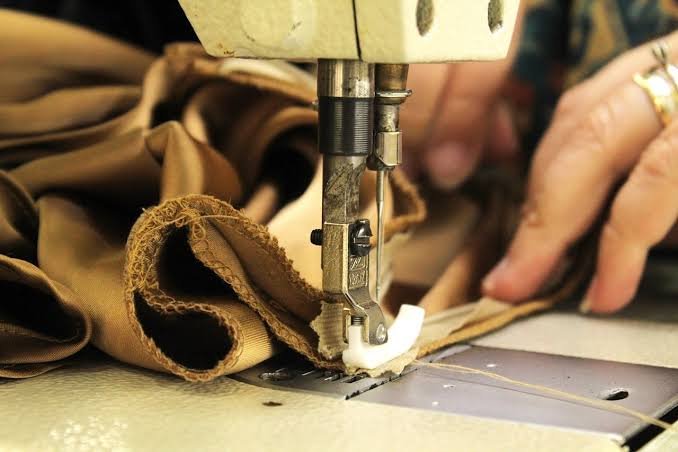
Step 10: Sew the Garments
During sewing, cut components are assembled into finished garments.
A typical sewing sequence may include:
- Join small components.
- Attach pockets or panels.
- Sew shoulder or body seams.
- Attach sleeves.
- Close side seams.
- Add collars, waistbands, or cuffs.
- Install zippers, buttons, or drawcords.
- Complete hems and reinforcement.
The exact order depends on the product.
In-Line Checks During Sewing
The production team should monitor:
- Measurements
- Stitch tension
- Seam strength
- Symmetry
- Pocket position
- Collar shape
- Zipper installation
- Workmanship
- Comparison with the approved sample
It is better to identify a problem after the first production pieces than after the full order is finished.
Step 11: Finish and Press the Garments
After sewing, garments move to finishing.
This stage may include:
- Thread trimming
- Stain cleaning
- Pressing or steaming
- Button and snap checks
- Zipper testing
- Garment washing
- Measurement checking
- Needle detection
- Final appearance correction
Finishing should improve the garment’s presentation without hiding construction problems.
For example, pressing may improve a seam’s appearance, but it cannot permanently fix an incorrectly sewn pattern or badly installed zipper.
Step 12: Inspect Bulk Quality
Quality control should happen throughout production, not only before shipping.
| Inspection Stage | Main Purpose |
|---|---|
| Material Inspection | Check fabric, color, trims, and shrinkage |
| Pre-Production Check | Confirm sample and production instructions |
| In-Line Inspection | Find sewing problems early |
| Finishing Inspection | Check appearance and measurements |
| Final Inspection | Confirm quality, quantity, and packaging |
A final inspection may check:
- Garment measurements
- Workmanship
- Fabric defects
- Stains
- Printing or embroidery
- Labels
- Size assortment
- Packing method
- Carton quantity
Brands can review a structured process through Quality Control Services.
The ISO Quality Management Overview also explains why clearly defined processes and responsibilities are important for consistent results.
Step 13: Pack and Ship the Order
After approval, garments are folded and packed according to the brand’s requirements.
Packaging may include:
- Care labels
- Hang tags
- Size stickers
- Polybags
- Tissue paper
- Thank-you cards
- Branded boxes
- Shipping cartons
Choose packaging according to the product and sales channel.
| Sales Channel | Practical Packaging Direction |
|---|---|
| Wholesale | Simple protective packaging |
| E-commerce | Individual bags and clear size labels |
| Premium DTC Brand | Branded packaging and customer inserts |
| Amazon FBA | Marketplace-compliant labels and cartons |
| Retail Store | Hang tags and retail-ready presentation |
Brands can review different options through Private Packaging Solutions.
Shipping may use:
- Express courier
- Airfreight
- Sea freight
- Rail freight
- Combined shipping methods
The best option depends on order size, destination, budget, and required arrival date.
Learn more through Clothing Shipping Solutions.
The Four Production Approval Gates
I recommend dividing the process into four approval gates.
| Approval Gate | What Must Be Confirmed | What Happens Next |
|---|---|---|
| Gate 1: Design Ready | Design, measurements, quantity, target cost | Sampling begins |
| Gate 2: Sample Ready | Fit, fabric, construction, branding | Bulk materials are ordered |
| Gate 3: Production Ready | Bulk materials, colors, trims, schedule | Cutting and sewing begin |
| Gate 4: Shipping Ready | Quality, quantity, packaging, documents | Order is dispatched |
This creates a simple rule:
No stage should move forward while important information from the previous stage remains unclear.
The four-gate model helps brands avoid late design changes, incorrect bulk materials, and rushed shipment approvals.
Common Causes of Production Delays
Production delays are not always caused by slow sewing.
Common causes include:
- Late sample comments
- Changing the design after approval
- Custom fabric development
- Failed color approval
- Missing artwork
- Complex printing or embroidery
- Delayed trim delivery
- Fabric quality problems
- Unconfirmed packaging
- Peak-season capacity
- Failed inspection
- Last-minute shipping changes
How to Reduce Delay Risk
- Confirm specifications early.
- Use available materials when appropriate.
- Send combined sample comments.
- Approve colors before bulk dyeing.
- Confirm labels and packaging with the garment.
- Include time for inspection.
- Plan shipping before production finishes.
- Avoid changing the design during bulk production.
A realistic production schedule should include development, material preparation, manufacturing, inspection, and transportation—not only sewing time.
What Brands Should Prepare
Before contacting a manufacturer, prepare as much of the following as possible:
Product Information
- Product type
- Reference images
- Technical drawings
- Measurement chart
- Fabric requirements
- Color references
- Size range
Branding Information
- Logo files
- Print artwork
- Embroidery artwork
- Label designs
- Hang tag designs
- Packaging requirements
Commercial Information
- Quantity per style
- Quantity per color
- Target price
- Sales market
- Delivery destination
- Required delivery date
Compliance Information
Requirements can depend on the country where the garments will be sold.
Brands selling in the United States can review the FTC Clothing and Textile Guidance for information about fiber content, country of origin, business identity, and care labeling.
Brands reviewing responsible supply-chain risks can also use the OECD Garment and Footwear Due Diligence Guidance.
FAQ
How long does casual wear production take?
The timeline depends on the product, quantity, fabric availability, sample revisions, decoration, and shipping method. Custom fabrics and complex construction normally require more time than basic products using available materials.
Is a sample required before bulk production?
Yes. A sample allows the brand to check the fit, fabric, construction, branding, and appearance before committing to the full order.
What is a pre-production sample?
A pre-production sample is the final approved garment used as a reference for bulk production. It should represent the confirmed fabric, measurements, construction, trims, and branding.
When is fabric ordered?
Bulk fabric is normally ordered after the product specifications, quotation, quantity, and sample are approved. The exact sequence may change when custom fabric development is required.
Is printing completed before or after sewing?
It depends on the design. Panel printing is often completed before sewing, while some embroidery, patches, and garment prints may be completed after assembly.
What happens during in-line inspection?
Inspectors check garments while production is still running. They review measurements, stitching, construction, decoration, and workmanship so problems can be corrected early.
Can brands change the design during bulk production?
Changes may be possible, but they can cause extra cost, material waste, quality risks, and delays. Major design changes should be completed during sampling.
What is the most important production stage?
No single stage guarantees quality. However, product specifications, material approval, and sample approval have the greatest influence on what enters bulk production.
What should be checked before shipping?
Check the garment quality, measurements, quantity, size assortment, labels, packaging, cartons, and shipping documents.
How can a startup make production easier?
Start with fewer styles, limited colorways, proven fabrics, simple construction, and clear branding. Expand the collection after the first products have been tested.
Conclusion
The casual wear production process is more than cutting and sewing.
A reliable process includes:
- Clear product planning
- Suitable fabric selection
- Accurate pattern development
- Physical sampling
- Written approval
- Controlled cutting and sewing
- In-line quality checks
- Final inspection
- Correct packaging
- Planned shipping
From my experience, the safest production projects are not necessarily the simplest. They are the projects where every important decision is made at the correct stage.
Approve the design before sampling, approve the sample before bulk production, and approve the finished order before shipping.
Bless Clothing supports casualwear brands with product development, fabric sourcing, sampling, private labeling, bulk production, quality control, packaging, and global shipping coordination.