
The casual wear production process turns a clothing idea into a finished product that is ready for customers.
Although casualwear may look simple, producing consistent T-shirts, hoodies, sweatshirts, joggers, and lounge sets requires careful planning at every stage. A small mistake in fabric selection, measurements, cutting, or washing can affect an entire production order.
From my experience working with apparel brands, the strongest results come from controlling quality before sewing begins—not trying to correct every problem during the final inspection.
In this guide, I will explain the complete casual wear production process, show what happens at each stage, and help brands understand where delays, quality problems, and unnecessary costs usually appear.
Table of Contents
- Quick Answer
- Casual Wear Production Process at a Glance
- Step 1: Define the Product Requirements
- Step 2: Create the Tech Pack
- Step 3: Select and Test the Fabric
- Step 4: Develop the Pattern
- Step 5: Make and Approve Samples
- Step 6: Prepare for Bulk Production
- Step 7: Inspect and Cut the Fabric
- Step 8: Add Printing or Embroidery
- Step 9: Sew and Assemble the Garments
- Step 10: Apply Washing and Finishing
- Step 11: Complete Quality Control
- Step 12: Pack and Ship the Order
- Typical Casual Wear Production Timeline
- Common Production Problems and Solutions
- How to Choose the Right Production Method
- How Bless Clothing Supports Casual Wear Production
- FAQs
- Final Thoughts
Quick Answer
The casual wear production process normally includes these stages:
- Product planning
- Tech pack preparation
- Fabric sourcing and testing
- Pattern making
- Sample development
- Pre-production approval
- Fabric cutting
- Printing or embroidery
- Sewing and assembly
- Washing and finishing
- Quality inspection
- Packaging and shipping
The approved sample, confirmed fabric, and complete production specifications should become the standard for every bulk garment.
For straightforward casualwear, sample development may take around 7–10 days, while bulk production commonly requires approximately 20–35 days after all materials and approvals are ready.
Casual Wear Production Process at a Glance
The following table shows the purpose of each production stage.
| Production Stage | Main Purpose | Key Output |
|---|---|---|
| Product Planning | Define what will be produced | Product brief |
| Tech Pack | Record technical requirements | Production instructions |
| Fabric Selection | Confirm material performance | Approved fabric |
| Pattern Making | Create garment shape and fit | Production pattern |
| Sampling | Test the complete product | Approved sample |
| Pre-Production | Confirm bulk details | Production approval |
| Cutting | Prepare garment panels | Cut components |
| Decoration | Apply artwork and branding | Printed or embroidered panels |
| Sewing | Assemble the garment | Finished clothing |
| Finishing | Improve appearance and hand feel | Final garment finish |
| Quality Control | Verify standards | Inspection report |
| Packing | Prepare goods for delivery | Shipment-ready cartons |
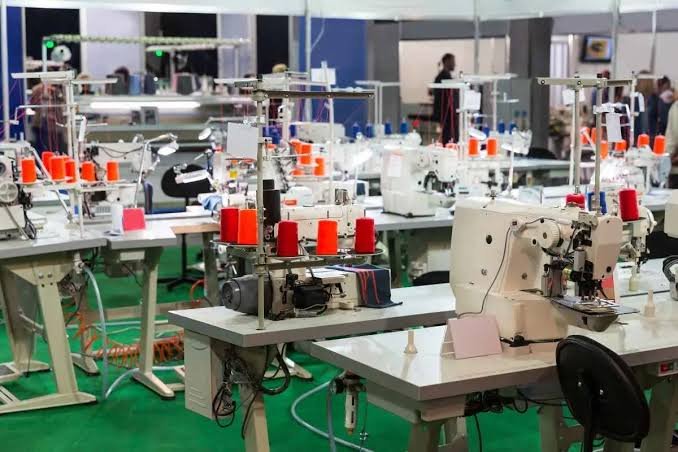
Each stage should have a clear approval point. Moving forward without approval increases the risk of rework, delays, and inconsistent quality.
Step 1: Define the Product Requirements
Production starts with a clear understanding of the product.
Before contacting a manufacturer, a brand should define:
- Product category
- Target customer
- Intended retail price
- Fit and silhouette
- Fabric expectations
- Color range
- Branding details
- Order quantity
- Launch deadline
For example, a basic everyday sweatshirt and a premium oversized streetwear sweatshirt require very different fabrics, patterns, sewing methods, and production budgets.
Product brief example
| Requirement | Example |
|---|---|
| Product | Oversized crewneck sweatshirt |
| Target Market | Premium casualwear |
| Fit | Boxy with dropped shoulders |
| Fabric | 380 GSM cotton fleece |
| Decoration | Small chest embroidery |
| Branding | Neck label and woven side label |
| Quantity | 100 pieces per style |
| Packaging | Individual recycled poly bags |
A clear brief helps the manufacturer recommend practical materials and processes.
Step 2: Create the Tech Pack
A tech pack is the main technical document used during product development and bulk production.
It should clearly explain how the garment must be made.
A complete tech pack usually includes
- Front and back technical drawings
- Measurement chart
- Size grading rules
- Fabric composition and GSM
- Stitching instructions
- Color references
- Artwork dimensions
- Logo placement
- Label specifications
- Packaging requirements
Why the tech pack matters
Without clear specifications, different teams may interpret the design differently.
For example:
- The pattern maker may create the wrong fit.
- The embroidery team may use the wrong logo size.
- The sewing team may use an incorrect seam.
- The packing department may attach the wrong labels.
A good tech pack reduces interpretation. It does not leave important details to memory or guesswork.
Step 3: Select and Test the Fabric
Fabric selection has one of the largest effects on casual wear quality.
The material controls:
- Comfort
- Structure
- Stretch
- Warmth
- Shrinkage
- Durability
- Product cost
Common casual wear fabrics
| Fabric | Common Products | Main Benefit |
|---|---|---|
| Cotton Jersey | T-shirts and tops | Breathability |
| French Terry | Sweatshirts and joggers | Lightweight comfort |
| Brushed Fleece | Hoodies and winter sets | Warmth and softness |
| Cotton-Spandex | Fitted tops and bottoms | Stretch and recovery |
| Cotton-Poly Blend | Everyday casualwear | Durability and stability |
| Modal Blend | Premium loungewear | Softness and drape |
For more guidance, review Custom Fabric Solutions.
Fabric tests before production
Brands should confirm more than the fabric's appearance.
Important tests include:
| Test | What It Checks |
|---|---|
| Shrinkage Test | Size change after washing |
| Colorfastness Test | Resistance to fading or transfer |
| Pilling Test | Surface durability |
| Stretch Recovery Test | Ability to return to shape |
| Fabric Weight Check | Whether the GSM matches the specification |
| Wash Test | Overall performance after care |
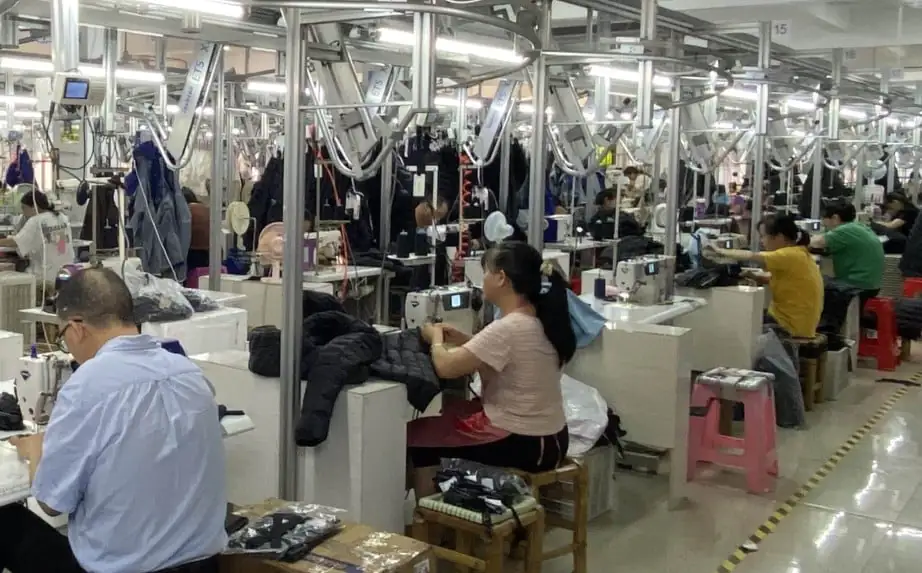
I recommend testing the fabric using the same washing and finishing methods planned for bulk production. A fabric can perform differently after garment dyeing, enzyme washing, or heavy printing.
Step 4: Develop the Pattern
The pattern controls the shape and fit of the garment.
A professional pattern maker converts the design and measurement chart into individual production pieces.
For a sweatshirt, the pattern may include:
- Front body
- Back body
- Sleeves
- Neck rib
- Cuffs
- Bottom rib
For joggers, it may include:
- Front leg
- Back leg
- Waistband
- Pocket pieces
- Cuffs
What pattern development affects
- Fit balance
- Shoulder position
- Garment length
- Sleeve shape
- Pocket placement
- Fabric consumption
- Production consistency
An oversized garment should not be created by simply increasing every measurement. The shoulder drop, body width, sleeve volume, and garment length must remain balanced.
Step 5: Make and Approve Samples
The sample stage turns technical information into a physical product.
A development sample allows the brand to check:
- Fit
- Fabric feel
- Measurements
- Construction
- Decoration
- Color
- Labels
- Overall appearance
Common sample types
| Sample Type | Purpose |
|---|---|
| Development Sample | Test the first design concept |
| Fit Sample | Confirm shape and measurements |
| Print or Embroidery Strike-Off | Approve artwork quality |
| Size Set | Check grading across sizes |
| Pre-Production Sample | Confirm the final bulk standard |
Sample review checklist
Before approval, check:
- Does the garment match the intended silhouette?
- Are key measurements within tolerance?
- Does the fabric behave correctly?
- Is the artwork placed accurately?
- Are seams comfortable and durable?
- Do trims and labels match the specification?
- Does the garment still perform correctly after washing?
A verbal approval is not enough. Final comments and approvals should be recorded in writing.
Step 6: Prepare for Bulk Production
Once the sample is approved, the manufacturer prepares all details for bulk production.
This stage is often called pre-production planning.
Pre-production confirmation should include
- Approved sample
- Final measurement chart
- Bulk fabric
- Color standard
- Artwork files
- Print or embroidery approval
- Trim approvals
- Quantity breakdown
- Size ratio
- Packing instructions
- Delivery schedule
Pre-production meeting
A professional production team may hold a pre-production meeting to explain the requirements to:
- Merchandisers
- Pattern makers
- Cutting teams
- Sewing supervisors
- Decoration suppliers
- Quality inspectors
- Packing teams
This reduces the chance that approved details are lost when the project moves from development to production.
Step 7: Inspect and Cut the Fabric
Before cutting begins, bulk fabric should be inspected.
Fabric inspection checks
- Shade consistency
- Fabric width
- GSM
- Surface defects
- Knitting flaws
- Color marks
- Quantity
Fabric rolls may be grouped by shade to prevent visible color differences within one garment.
Fabric relaxation
Some knit fabrics need time to relax before cutting.
This helps prevent:
- Measurement changes
- Twisting
- Panel distortion
- Unexpected shrinkage
Cutting process
The usual cutting workflow includes:
- Fabric spreading
- Marker placement
- Panel cutting
- Component numbering
- Bundle preparation
Accurate cutting is essential because sewing cannot fully correct incorrectly cut panels.
Step 8: Add Printing or Embroidery
Depending on the construction, printing or embroidery may happen before or after sewing.
Common decoration methods
| Method | Best For | Main Consideration |
|---|---|---|
| Screen Printing | Large graphics | Color count and curing |
| Puff Printing | Raised streetwear artwork | Heat and expansion control |
| DTG Printing | Detailed artwork | Fabric compatibility |
| Silicone Printing | Clean premium effects | Adhesion and flexibility |
| Flat Embroidery | Logos and text | Stitch density |
| Appliqué | Large premium graphics | Edge finishing |
Decoration quality checks
The production team should confirm:
- Correct artwork
- Accurate color
- Proper placement
- Correct dimensions
- Strong adhesion
- Clean embroidery
- No fabric damage
Artwork should be tested on the actual bulk fabric whenever possible. The same ink or thread can look different on different fabric colors and textures.
Step 9: Sew and Assemble the Garments
During sewing, individual panels become complete garments.
The operations depend on the product type.
Typical T-shirt operations
- Shoulder joining
- Neck rib attachment
- Sleeve attachment
- Side seam sewing
- Bottom hemming
Typical hoodie operations
- Hood assembly
- Pocket attachment
- Shoulder and sleeve sewing
- Side seam construction
- Rib attachment
- Drawcord installation
In-line quality control
Inspectors should monitor production while garments are being sewn.
They check:
- Stitch consistency
- Seam strength
- Symmetry
- Measurements
- Construction details
- Workmanship
Finding a problem during the first 20 garments is much safer than discovering it after 2,000 garments are finished.
Step 10: Apply Washing and Finishing
Some casual wear products require washing or finishing after sewing.
Common processes include:
- Garment washing
- Enzyme washing
- Vintage washing
- Garment dyeing
- Silicone softening
- Brushing
- Anti-pilling finishing
Why finishing matters
Finishing can change:
- Color
- Hand feel
- Measurements
- Shrinkage
- Surface texture
- Overall appearance
For this reason, patterns and measurements should account for expected changes after washing.
Final finishing work
After washing, garments may require:
- Thread trimming
- Ironing or steaming
- Shape adjustment
- Stain removal
- Metal detection
- Label checking
Step 11: Complete Quality Control
Quality control should happen throughout production, not only at the end.
A strong inspection system includes three main levels.
Pre-production inspection
Checks:
- Fabric
- Trims
- Sample approval
- Technical documents
In-line inspection
Checks:
- Sewing quality
- Measurements
- Decoration
- Production consistency
Final inspection
Checks:
- Finished appearance
- Measurements
- Workmanship
- Quantity
- Packaging
- Carton information
For more information, see Quality Control Services.
Final garment checklist
| Inspection Area | What to Confirm |
|---|---|
| Measurements | Within approved tolerance |
| Sewing | Clean and secure |
| Fabric | No holes, stains, or defects |
| Color | Matches approved standard |
| Printing | Correct position and adhesion |
| Embroidery | Clean stitches and correct density |
| Labels | Correct brand and care information |
| Packaging | Correct folding and assortment |
Final inspection should confirm whether production matches the approved standard—not create a new standard after production is complete.
Step 12: Pack and Ship the Order
After final approval, the garments are prepared for shipment.
Typical packing includes:
- Folding
- Hang tag attachment
- Size sticker application
- Individual bagging
- Carton packing
- Carton labeling
- Packing list preparation
Shipping options
| Shipping Method | Best For | Main Advantage |
|---|---|---|
| Express Courier | Samples and small orders | Speed |
| Air Freight | Urgent bulk orders | Faster delivery |
| Sea Freight | Large orders | Lower cost per unit |
| DDP Shipping | Brands needing simpler import handling | Convenience |
The correct method depends on order size, budget, and launch deadline.
Typical Casual Wear Production Timeline
The following timeline is a practical reference. Actual timing depends on fabric availability, product complexity, approvals, and production capacity.
| Stage | Typical Time |
|---|---|
| Product and Tech Pack Review | 1–3 days |
| Fabric Sourcing | 3–10 days |
| Sample Development | 7–10 days |
| Sample Revision | 5–10 days per round |
| Bulk Material Preparation | 5–15 days |
| Bulk Production | 20–35 days |
| Final Inspection and Packing | 2–5 days |
| Shipping | Depends on method |
What commonly extends the timeline?
- Custom fabric development
- Multiple sample revisions
- Special washing
- Complex embroidery
- Late approvals
- Peak-season capacity
- Changes after bulk production begins
Brands with fixed launch dates should include extra buffer time instead of planning around the fastest possible schedule.
Common Production Problems and Solutions
| Production Problem | Common Cause | Practical Solution |
|---|---|---|
| Wrong Measurements | Incomplete specs or sewing variation | Confirm tolerances and inspect in line |
| Fabric Shrinkage | Insufficient testing | Complete wash testing before approval |
| Color Differences | Different dye lots | Approve bulk color and manage shade lots |
| Print Cracking | Incorrect ink or curing | Test artwork on production fabric |
| Embroidery Damage | Excessive stitch density | Adjust digitization and backing |
| Uneven Sewing | Weak production control | Inspect early production units |
| Delayed Delivery | Late materials or approvals | Confirm the critical path before production |
| Wrong Packaging | Unclear instructions | Approve a packing sample |
My production-risk priority order
When time or budget is limited, I recommend protecting these areas first:
- Fabric performance
- Fit and measurements
- Decoration quality
- Sewing durability
- Packaging details
A beautiful package cannot compensate for a poorly fitting or unstable garment.
How to Choose the Right Production Method
Not every casual wear project requires the same production model.
Choose private label when
- You want a faster launch.
- You need lower development complexity.
- You are testing a new market.
- Limited customization is acceptable.
Choose OEM or cut-and-sew when
- You need a custom fit.
- Your fabric is unique.
- You have a complete tech pack.
- Product differentiation is important.
Choose ODM when
- You want to modify an existing manufacturer design.
- You need more flexibility than basic private label.
- You want to reduce development time.
For manufacturing support, review OEM & ODM Services and Private Label Clothing Manufacturer.
How Bless Clothing Supports Casual Wear Production
At Bless Clothing, we support apparel brands through the complete casual wear production process.
Our services include:
- Product development
- Tech pack review
- Fabric sourcing
- Pattern making
- Sample production
- Printing and embroidery
- Bulk manufacturing
- Quality inspection
- Custom labels and packaging
- Global shipping support
Helpful resources
- Private Label Clothing Manufacturer
- OEM & ODM Services
- Custom Fabric Solutions
- Quality Control Services
- OEKO-TEX®
We typically recommend that new brands begin with a focused product range, approve physical samples carefully, and scale production after confirming customer demand.
FAQs
How long does casual wear production take?
Sample development commonly takes around 7–10 days. Bulk production often takes approximately 20–35 days after sample approval and material confirmation.
What is the most important stage of production?
There is no single stage that guarantees quality. However, fabric approval, sample approval, and pre-production confirmation have the greatest influence on the final result.
Should I approve a sample before bulk production?
Yes. Brands should approve the fabric, measurements, construction, decoration, labels, and overall appearance before bulk production begins.
What causes most casual wear quality problems?
Common causes include incomplete specifications, untested fabrics, unclear approvals, weak in-line inspection, and changes made after production starts.
Can a startup produce custom casualwear?
Yes. Startups can begin with a focused collection and a practical MOQ. Using available fabrics and limiting colors can reduce development risk.
Is final inspection enough to guarantee quality?
No. Final inspection can identify defects, but it cannot efficiently correct every problem. Quality should be controlled during fabric preparation, cutting, sewing, decoration, and finishing.
What products are included in casual wear production?
Common categories include T-shirts, hoodies, sweatshirts, joggers, casual pants, shirts, jackets, lounge sets, and everyday basics.
Final Thoughts
The casual wear production process is a connected system.
Every stage affects the next:
- Product requirements guide the tech pack.
- The tech pack guides sampling.
- The approved sample guides bulk production.
- In-line inspections protect consistency.
- Final quality control confirms the finished order.
The most reliable brands do not depend on final inspection alone. They prevent problems through clear specifications, tested materials, controlled approvals, and consistent communication.
If you are developing a custom casual wear collection, visit Bless Clothing to learn how we support brands from product development and sampling through bulk production, quality control, and shipping.